
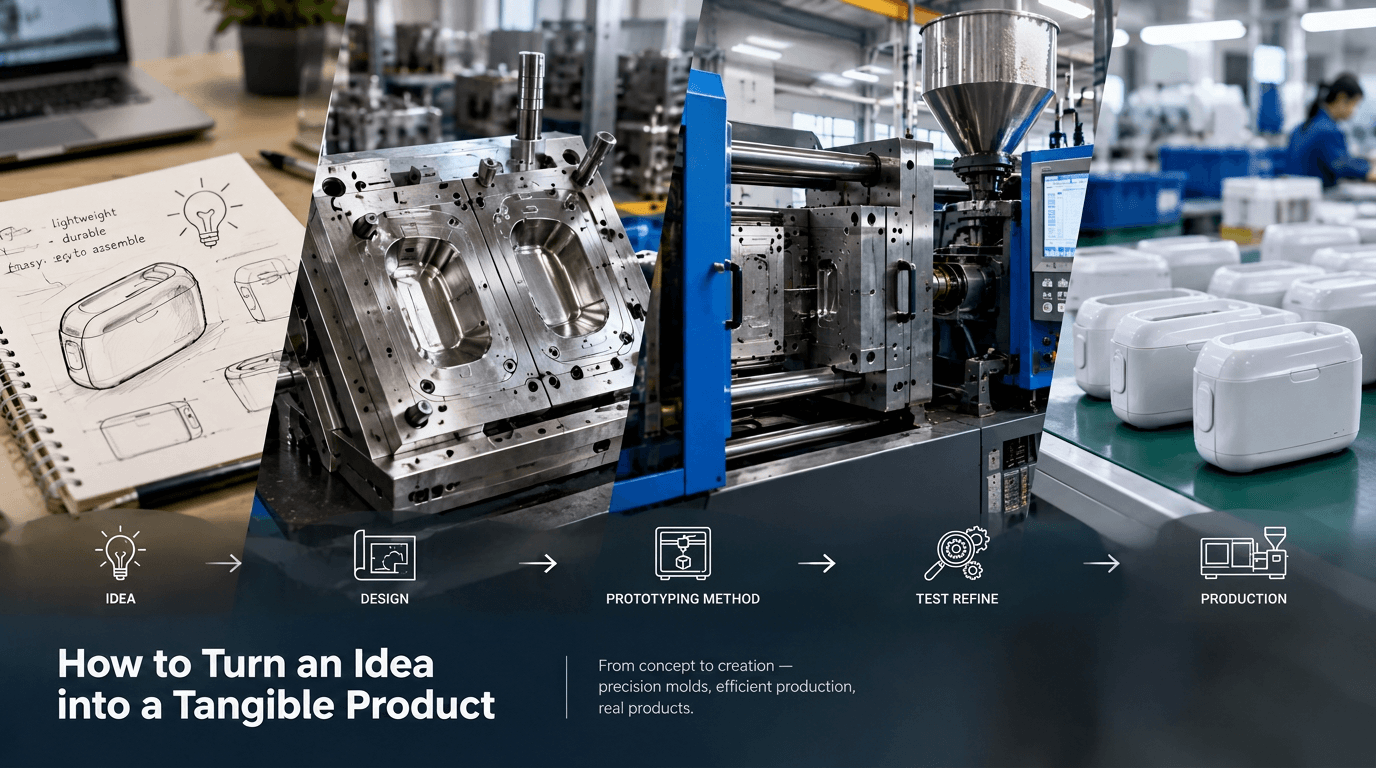
As a buyer navigating rapid prototyping,, when faced with the challenge of turning an idea into a physical prototype that meets your expectations, you might think it’s as simple as finding a manufacturer, requesting quotes, preparing drawings, and finalizing the design. However, the details of this entire process are not so straightforward—there are many pitfalls to avoid. A reliable prototype should be able to reveal design flaws and have undergone DFM review—especially if you plan to move to mass production later on.
So, here are the four key steps for producing a reliable prototype: market assessment, CAD drawing confirmation, two-tier DFM review, and process selection. At the end of this article, we’ve also included a guide to selecting suppliers. We hope this helps you save on rework costs during the prototyping phase, avoid delays, and steer clear of design pitfalls.
Step 1: Defining Requirements and Identifying Prototype Goals
Quick tip: Don’t place orders blindly without a clear prototype goal. Assessing the target value and market feasibility in advance can help you avoid the waste caused by repeated revisions in rapid prototyping.
Before requesting quotes from suppliers or sending CAD files, you must clarify two key areas to lay a solid foundation: business validation and technical specifications.
1. Validate Market and Business Feasibility
Before requesting quotes from suppliers or sending CAD files, you must clarify two key areas to lay a solid foundation: business validation and technical specifications.
1. Validate Market and Business Feasibility
If the market demand for your product has not yet been validated, do not invest funds in creating a physical prototype. You need to clarify the following:
Target Audience Identification: First, who is the target audience for your product—their gender ratio, age distribution, and characteristics.
Core Value & Differentiation: Second, ask yourself where your product’s differentiation or advantages lie compared to similar products on the market, and what unique pain points it can solve.
You can follow this process to conduct a quick market demand survey:
Analyze Demand & Trends: Once you’ve identified your target countries—each of which has massive market demand—use Google Trends and keyword tools to analyze your product’s popularity and trends over the past year.
Estimate Market Capacity: You can also use e-commerce crawler tools like Jungle Scout and Helium10 to examine competitors’ sales volume, pricing, and negative reviews on Amazon to better estimate market capacity.
Gauge Product Feedback: If you’re launching a brand-new product, check Kickstarter and social media for feedback on similar innovative products.
Run Financial Calculations: Before creating prototypes, run the numbers: include the following metrics—target selling price, estimated cost of goods sold (COGS), and expected profit margin. Remember to factor in shipping costs and certification fees.
If your calculations show the profit margin is too thin, even if market demand is high, scrap the idea immediately—don’t waste money on prototypes.
2. Define Technical Specifications and Validation Objectives
Before creating a prototype, you need to establish preliminary product specifications, including product dimensions, operating environment (temperature, stress conditions), prototyping budget, and your estimated order volume.
Here’s an important reminder for beginners: prototypes are mostly used for visual presentation. While color schemes and surface finishes (SLA 3D printing and silicone lamination produce good results) can be demonstrated at this stage, you’ll still need to conduct:
Assembly fit tests: to verify mechanical tolerances, part compatibility, and clearances.
Functional and durability tests: to assess structural strength, load-bearing capacity, and performance under real-world operating conditions.
Case Study: Tablet Mount Housing for Bicycle (German Market)
Suppose you’re currently sourcing a tablet mount housing for a bicycle intended for the German market. Based on your preliminary market research, you’ve identified the dimensions, environmental conditions, and materials prevalent in the market—these can be provided to the factory as design constraints:
Design Constraints: Maximum external dimensions of 182 mm × 124 mm × 38 mm ,the operating environment is -15°C to +55°C, for outdoor cycling the mount is subject to continuous vibration from riding, and the clamping area must withstand the tablet’s own weight plus shock loads from bumps.
Aesthetic Prototype: At this stage, you can first use SLA stereolithography to produce a prototype to confirm the housing’s contours and surface texture, without conducting vibration or load-bearing tests.
Assembly and Fit Verification Prototype: Use CNC-machined PP material to verify that the housing’s seam gaps and the step differences at the clamping slider sections meet the German client’s visual acceptance standards. Verify that purchased components—such as rubber anti-slip pads, locking knobs, and handlebar mounting bases—fit and are compatible to avoid BOM material selection conflicts and increased material management costs. All assembly issues will be compiled and reported to the structural engineer for modification before the injection mold is commissioned, thereby avoiding rework costs, delivery delays, and the risk of end-user complaints during mass production.
Functional Durability Test Samples: Specifically used to conduct drop tests and repeated latch opening/closing durability tests to verify whether the latches are prone to brittle fracture in low-temperature environments.
3. Communicate Design for Manufacturability (DFM) Requirements Early
Clear DFM review is essential to reduce risk during rapid prototyping before injection molding. Before deciding to proceed with prototyping, you should assess whether the product will serve as a transitional version for subsequent mass production. If so, you should inform the manufacturer as early as possible and inquire whether they can accommodate both prototype-level DFM and mass-production-level DFM.
Notify your manufacturing partner as early as possible whether this prototype is a single sample or a transitional version leading to subsequent mass production:
Prototype Version (DFM): Must address common manufacturing risks associated with CNC machining, stereolithography (SLA), and vacuum casting—such as air bubbles, wall thickness, undercuts, and venting issues.
Mass-Production-Ready DFM: Evaluate draft angles, gate locations, and steel mold feasibility to ensure the prototype design can be smoothly transitioned to small-batch injection molding production.
Finally, a reminder for beginners: don’t forget to require the factory to document all DFM recommendations in a written report for your records, to control future mold modification costs and delivery schedule risks.Pitfalls for Buyers to Avoid at This Stage
- Over-specifying in the early stages:Ordering expensive, custom-made functional prototypes when only an appearance sample is needed to test market feedback.
- Ignoring mass production realities:3D-printed prototype parts may function normally, but the design may be unsuitable for mold-making or high-volume injection molding.
- Skipping business evaluation:Investing heavily in repeated prototyping without first confirming whether the target unit price will yield a reasonable profit.
Step 2: Prepare 3D CAD Drawings for Rapid Prototyping
3D CAD drawings are three-dimensional models created by project engineers on a computer that fully replicate the product’s exterior shape and internal structure. Suppliers may sometimes simplify the structure on their own to save time or improve the prototype’s appearance, such as by removing internal undercuts. You can note in the DFM report that:
“This modification is for the prototype only; the original design must be restored for injection molding.”
Additionally, the drawings should clearly specify tolerances (prototyping tolerances differ from injection molding tolerances) and clearly indicate the critical fit dimensions of the prototype to facilitate priority verification.
Prototyping Process vs. CAD Requirements
- SLA 3D Printing:Great for fine ribs and complex surfaces, but overhangs require support structures.
- CNC Machining:Cannot process deep, narrow slots or internal micro-undercuts.
- Vacuum Casting (TPU):Wall thickness that is too thin causes short shots; wall thickness that is too thick creates internal air bubbles.
Step 3: Choose the Right Printing and Prototyping Process
Aesthetics and cost aren’t the key factors in choosing a printing process for rapid prototyping ;rather, it’s the structural integrity and functional durability testing that matter most. Many printing pitfalls involve products that look good but fail functional testing entirely—users fall into the “appearance trap.” To help you avoid these pitfalls, I’ll first introduce the common processes available on the market for product prototype and their characteristics:
|
Process Type |
Key Advantages |
Potential Pitfalls / Red Flags |
Best Used For |
|
SLA Printing |
Smooth surface, fine details, fast turnaround (2–3 days) |
Brittle resin; poor impact/vibration resistance |
Aesthetic mock-ups, color & visual fit checks |
|
CNC Plastic Machining |
Production-grade material, high precision (3–5 days) |
High labor cost for deep cavities and fine ribs |
Fit checks, structural & functional testing |
|
Vacuum Casting (TPU) |
Low-cost per unit for small batches |
Lower dimensional accuracy, potential bubble/flash defects |
Low-volume aesthetic or non-load-bearing parts |
Step 4: Rapid Prototype Testing, Feedback Collection, and Iterative Refinement
As I understand it, this stage is when project guidelines are finalized and design risks are identified. If the details aren’t handled properly during this stage, it’s easy to fall into these three pitfalls. Let’s use the different approaches of Buyer A and Buyer B toward the factory as examples. (Buyer A vs. Buyer B)
Scenario 1: Number of CAD Drawing Iterations & Additional Charges for Revisions
❌ Buyer A: Submitted a Request for Quotation (RFQ) for a CNC-machined assembly prototype without specifying the number of free revisions allowed. When testing of the first version (V1) revealed an assembly failure, the buyer requested modifications; however, the supplier demanded additional fees and an extended lead time, leading to a dispute between the two parties.
✔ Buyer B: Explicitly stated in both the RFQ and the Purchase Order (PO) that “the quoted price includes two rounds of free CAD revisions; any subsequent revisions will require a new quote. All revisions must include a version number and an Engineering Change Notice (ECN).”
Scenario 2: Drawing Version Control and Unregulated Distribution of Drawings
❌ Buyer A: Sends updated CAD files haphazardly via various chat apps, using inconsistent file formats. The factory, faced with a disorganized jumble of files, mistakenly uses an outdated version—resulting in the entire batch of produced parts having to be scrapped.
✔ Buyer B: Requires all CAD files to be labeled with version numbers (V1, V2, V3) and accompanied by an Engineering Change Notice (ECN). The factory must provide formal confirmation that it has received the latest version of the files before beginning production.
Scenario 3: Ambiguous Acceptance Criteria and Ill-Defined Boundaries
❌ Buyer A: Stated in the Request for Quotation (RFQ) that “samples must be assemblable and have a normal appearance.” Upon receiving the goods, Buyer A complained that the gaps were too large; the factory argued that CNC machining tolerances are unavoidable and refused to perform rework at no cost.
✔ Buyer B: Included inspection standards in the RFQ, specifying that tolerances must be kept within 0.2 mm, and clearly defined the distinction between acceptable manufacturing characteristics and defects that require the supplier to perform rework.
Special Section: Common Pitfalls in Overseas Prototyping and Supplier Selection—Plus Tips for Risk Mitigation
Supplier “Blacklist” (Red Flags)
Excessive Outsourcing of Core Processes
Supplier capacity and process capability directly affect the quality and lead time of rapid prototyping. A factory may own CNC machines and produce master patterns, but outsource vacuum casting (silicone molding) to cut costs. This frequently leads to delivery delays, color inconsistencies, and accountability issues caused by multi-layered subcontracting.
Lack of Inspection and Post-Processing Infrastructure
The absence of basic testing and measurement tools is a major red flag. Specifically, check for a dedicated, dust-free spray-painting booth. The painting stage is where a prototype’s appearance is most likely to be compromised; dust particles can easily cause color discrepancies and surface roughness—defects that are extremely difficult to rectify later.
Fabricated Case Studies
When evaluating suppliers, confirm whether they have in‑house equipment for rapid prototyping.S uppliers that can only provide digital renderings rather than actual, physical samples are a warning sign. Furthermore, if they can only show you “figure” or “statue” style samples—rather than demonstrating a full-cycle capability (from initial prototyping and rapid tooling to small-batch injection molding)—they likely lack the necessary end-to-end production expertise.


Artículos Relacionados
Garantía de calidad y control de calidad | Definición-Diferencia-Métodos-Proceso
¿Qué es el moldeo por inyección-part1
Algunos consejos lo ayudan a comprender las máquinas eléctricas de moldeo por inyección